Hello friends! I am back today with a very full video and blog post showing how to make and can strawberry jelly! Its much easier than one would think and its such a fun summer activity! Everything you need to know is in the video but there are a ton of pictures and more info below!
↓ More info below! ↓

You will need canning supplies for this recipe. Everything I got from Walmart for under $50.
Large Stockpot with Rack
8 oz Jelly Jars
Jar Lifter
Large Mouth Funnel
Air Tool remover ( a knife will work just fine too! )
Magnetic Lid Wand
Kitchen Gloves to screw on hot lids
For the Jelly
Fresh Berries - You will need about 5 cups of smashed fruit - I used about 1 gallon of strawberries
Fresh Lemon
7 cups white sugar
Fruit Pectin - found in the canning supply area -
Here's the Steps:

The first thing you need to do is clean the berries really good. I show you in this video how I do it because you really want to get rid of any bacteria before canning. So clean them well and hull each berry. Just take a small knife and cut the green top off.
Meanwhile
.png)
Put the jars into your big canning pot in the rack to warm while making the jelly. I did clean all the jars first...but this is just so you don't break a jar by putting a hot liquid into a cold jar. Just keep it simmering on low. Put the lids and bands in another pot to simmer too.
You are going to need 5 cups of smashed fruit.I found I got that from about 1 gallon of strawberries.

I like to use the food processor to kinda mash the berries but you can totally do this by hand with a potato masher on a cookie sheet. I just find this way easier.

Add five cups of mashed fruit

The juice of one small lemon

and add 1 box of the fruit pectin.

Mix well and bring it to a boil

Then add

7 cups of white sugar

and stir in.

Add 1 tablespoon of butter and bring to boil ( it helps reduce the foam )

Scrap off as much of the foam as you can while it is boiling. This gunk makes your jelly cloudy! So take your time and remove as much as you can.

Remove only a few jars at a time and shake out.

Using a ladle and the large mouth funnel pour the hot jelly into the warm jars. The bottom of the funnel is a good indication of where to stop but you want to leave about 1/4 of an inch from the top of the jar.

Run the air bubble tool or knife down the sides of each jar to make sure there are no air pockets
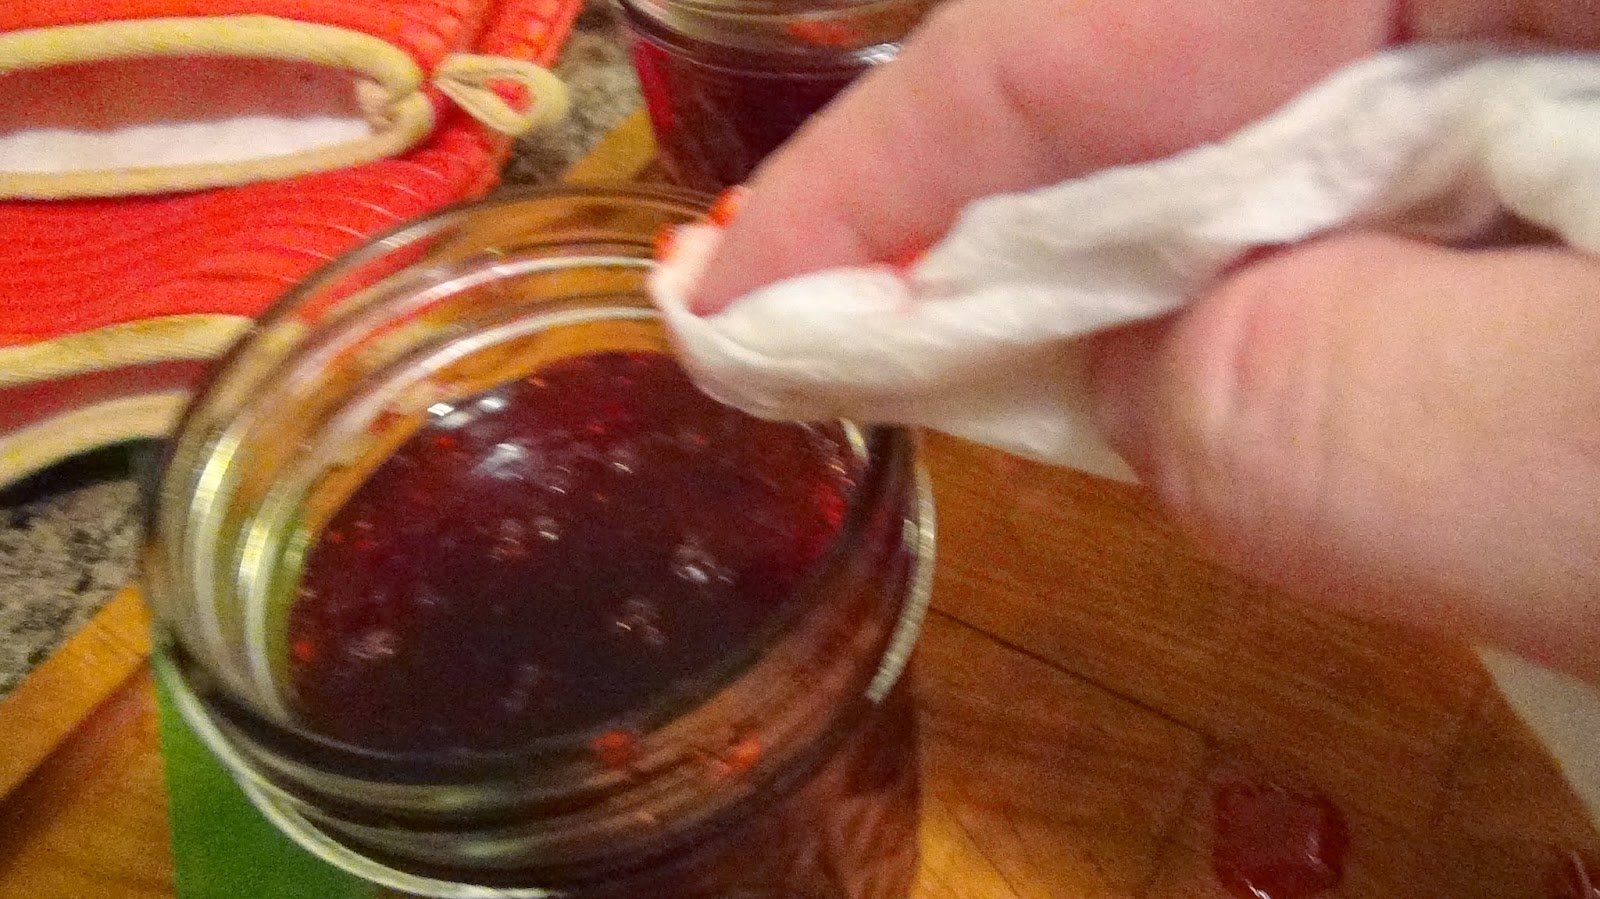
Use a damp paper towel and wipe down the rim of the jar.

Using the magnetic wand get the lids out of the warm water and screw on the jars. You don't want to screw them on tight...just snug.

Return the jars to the stock pot and bring to a boil

Boil for 12 minutes and then let rest for 5 additional minutes in the hot water.

Afterwards remove the jars and listen for the sweet popping sound that means the jars are sealing. They just " pop" which means you did it right. Just let them rest over night. The next morning check remove the bands and make sure the jars are sealed. If any are not, just pop in the frig and use up. The rest you can store in your pantry.

I am going to be giving a lot of these away. While I liked the labels that came with the jars and even the extra ones I bought, I decided only use a few and special order some labels for them! I thought since they are going to be gifts, nice tags just make them look even cuter! I hope you give this recipe a try. Its really not hard and its a fun summer activity to involve the kids with. They can get the berries ready and screw on the bands. I even made a batch of peach jelly...which I think I am keeping all to ourselves because its that good! :) Let me know if you have any questions either in the comments on the video or on here. And also let me know if you make it!